Interactive usage
A great use of Qibocal is to run routines interactively, processing the results of the routines in an interpreter or a notebook, or launching further ones only after receiving results in the same environment.
An example of this workflow is shown in the README.
How to run it on a queue
While Qibocal itself does not require any special handling for interactive usage, it is common enough to place shared resource behind a queue infrastructure.
In these cases, you may experience some additional complications, since Qibocal has to run on a machine with the capability of connecting to the control electronics.
To cater for this use case, the only additional requirement is to run your notebook (or
intepreter) on the machine with instrument access, and possibly establish a suitable
port forward for its interface just through ssh itself.
Since it is potentially complex to identify which remote address and port to forward, the following script should help automating the process.
#!/bin/bash

read -rd '' getport <<EOF
import socket

s=socket.socket()
s.bind(("", 0))
print(s.getsockname()[1])
s.close()
EOF

read -rd '' getip <<EOF
import sys

ips = sys.stdin.read().split(" ")
print([ip for ip in ips if ip.startswith(sys.argv[1])][0])
EOF

SUBNET=""
IP=$(hostname -I | python -c "$getip" "$SUBNET")
PORT=$(python -c "$getport")

echo "Forward your local port with:"
echo "  ssh <login-node> -L 9180:$IP:$PORT"

echo
echo "Connect to:"
echo "  https://localhost:9180"

jupyter lab --ip "$IP" --port "$PORT" --no-browser
# you can also test this with:
# python -m http.server -b "$IP" "$PORT"
Once the required server is dispatched as queue job with the script, the instructions to connect will appear in the output (usually redirected by the queue system on a file).
Note
If the system you are targeting, the remote computing node, is actually part of multiple networks, and you need to discriminate the correct one to use, just add the subnetwork as a string in the former
E.g. you could use:
SUBNET="192.168.XXX"
to specify a local network whose 3rd byte is XXX (e.g. 0, 1, …, 255)
Step-by-step guide
In case of doubts, let’s go step by step through the script usage.
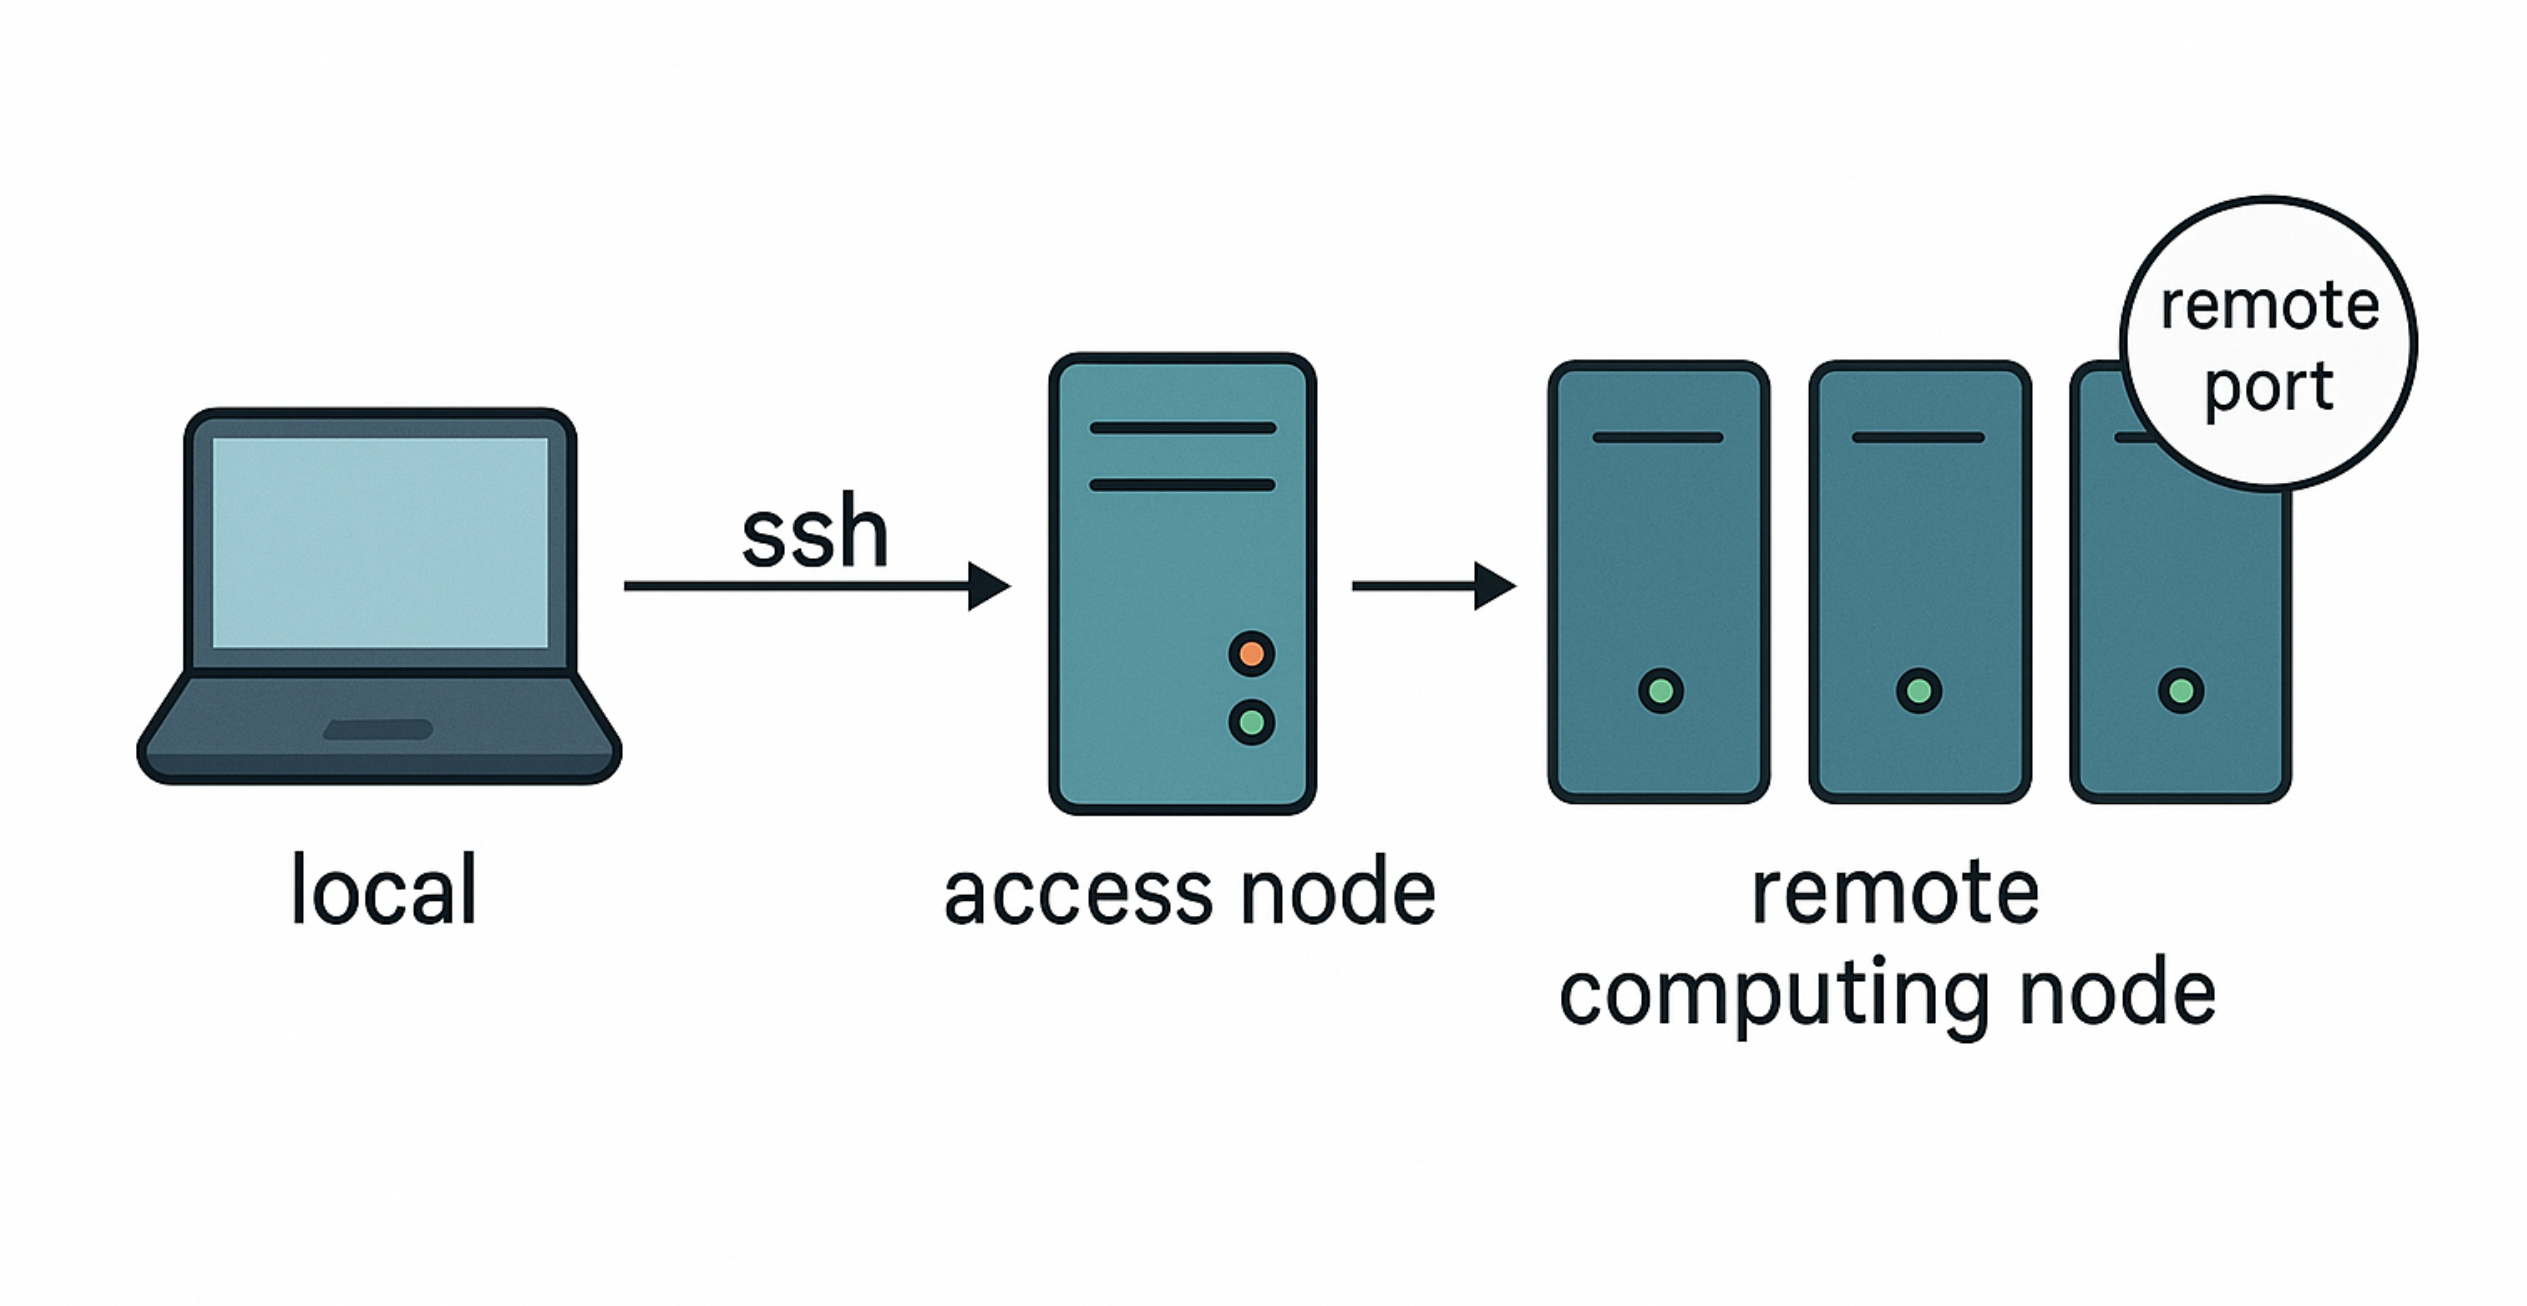
the script itself is supposed to be executed on the remote computing node (cf. figure above), which is the one with direct access to the resources (thus, the one which is usually already behind the queue)
notice that the instructions printed in the output will direct you to establish a further SSH connection, which will be the bridge between the local system and the remote computing node, through the access node (cf. figure above), on it can be established with a further ssh command execution on the local system
eventually, the client connection should be established from the same local system
Example: SLURM + laptop
In the case of SLURM queue system, which is accessible through an access node, where the user ssh from its laptop:
the script is the one you should sbatch - possibly adding to it all the rest of the logic, as needed
the further ssh command (printed in the instructions) should be run on the laptop
the final URL to connect can be pasted in a browser on the same laptop (e.g. Mozilla Firefox)
Further notes
Jupyter tokens
This is not related to this guide, but just to Jupyter itself.
When Jupyter opens the browser automatically, it uses a URL containing a token, for ease of access. If you just specify the address and port, the token will not be included. But you can find it in the output of the command in the jupyter server (thus in the log of the queue job, if you are using a queue, as in this guide), and manually insert it in the page which is presented by Jupyter when the URL token is not used.
More details in Jupyter docs: https://jupyter-server.readthedocs.io/en/stable/operators/security.html